I AM SO EXCITED CAN YOU TELL?? I just finished up creating my product, which is a series of personalized DIY kits that I am selling not for profit. Here is the email I wrote to send out to the school. The kits are available for purchase starting...now! Please leave at least two days for preparation and hand delivery. Love to all stay creative (with the help of my DIY kits)!
Hi all!
For my Keystone, I am creating DIY (Do it Yourself) Kits for craft projects and even some basic life skills such as ironing and laundry. I am making a working list that will be going out to the school, so if you are interested please email me at either at my JCHS email or riviwriter@gmail.com. The kits will cost anywhere from $5-30 and will include everything you may need for your project, including instructions I wrote/designed myself. Each kit is individualized with your choices of paint, shirt size, etc. All profits will go towards art programs in schools, and I would really appreciate your support for my Keystone. Thank you so much!
Rivka/Rebecca Dollinger
Current list:
DIY Chalkboard Paint Kit— Includes: 3 oz acrylic paint (your choice of color), 3 tablespoons unsanded grout, Spoon for mixing, spoon for measuring, instructions, and your choice of surface (Picture frame, small wood sign/shape, door hanger)— $13
Ironing Basics (does NOT include iron)— Includes: Ironing Mat or Towel, Tutorials and Instructions (Created by me on Photoshop), A few small fabric scraps for practice, Cardboard sheet to go between layers of clothing, A few iron on patches or appliqués— $18
DIY Fabric Softener +DIY Wrinkle Releaser+ Vintage-ize your tee — Includes: Instructions created by me for all three projects (3), list of resources for DIY life (1)— $5
DIY Decorated Notebook— Includes: One (1) Composition book, Five (5) sheets of misc. scrapbook papers, One (1) paper punch, one (1) pair of funky edged scissors, one (1) jar of mode podge— $20
DIY Shutter Buddy (An attachment for a lens to make kids look at the camera)— Includes: Instructions, Elastic, fabric for main piece (your color of choice), fabric for decoration (your choice of colors/designs), photos/examples for inspiration— $18
DIY Magnetic Poetry— Includes: Magnetic Strip, Instructions, Sharpie and Paper (for handwritten), List of free fonts and corresponding websites— $14
DIY Stenciled Shirt— Includes: One (1) White shirt (your preferred size), Three (3) fabric paints, Three (3) pre made stencils, Three (3) Freezer sheets (optional; if you choose to make your own stencil), Instructions on stenciling shirts, instructions on creating a stencil— $21
Learn to paint on fabric!— Includes: Instructions on fabric painting, stamping, and stenciling, Your choice of five (5) Fabric paints, Found objects for stamping, One (1) pre made stencil, 1 choice of fabric to dye (shirt, bag, scarf) , rubber gloves, One (1) bottle or packet of fabric dye (your choice of color) — $30
Sunday, April 27, 2014
Wednesday, April 23, 2014
Deadlines!
The Keystone Final Deadline is May 2!! AHHH!! Freak out with me :) If anyone has final ideas for the guidebook or anything they want to see in my final product, speak now or forever hold your peace. I have a feeling most of you will be doing the latter, since I have gotten NO feedback whatsoever during this process. But hey, I love all my followers. Both of them.
Love to all stay creative!
Love to all stay creative!
Sunday, April 20, 2014
Cravings
Just watched an episode of How I Met Your Mother from season one where they mentioned these delicious cupcakes. Maybe it's the Passover bread fast getting to me, but I really want to bake some cupcakes! Anyways, I thought maybe now I'll throw in a cupcake recipe to my college recipes section. Microwave cupcake? How to keep a batch of cupcakes good for several weeks (or days...)? Comment below with your favorite recipes and maybe I'll post some of my favorites!
Love to all stay creative!
Love to all stay creative!
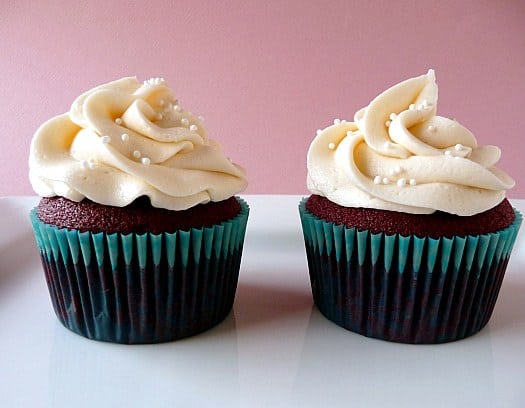 |
| Don't these just look scrumptious? Sorry for tempting all of you on Passover. http://www.browneyedbaker.com/2010/11/08/red-velvet-cupcakes-cream-cheese-frosting/ |
Thursday, April 17, 2014
How to make your t-shirts feel vintage soft
I put this in my guidebook, but since it was taken basically entirely from another website (sourced and cited, of course), I thought I paste it here. Might be of interest to some of you!
http://www.octaneshop.com/pages/brine-your-tee

http://www.octaneshop.com/pages/brine-your-tee
Ironing Basics
Thought I'd give ya'll a taste of what my guidebook will be. Here are a few of my pages on ironing basics:


Sunday, April 6, 2014
Ironing
Let me just start by saying that up until about two months ago, I had never picked up an iron. Even when I did iron on decals and fuse beads, etc., I always had my mom iron for me. Well, as I started sewing and using more iron on projects, I finally learned to use an iron. I'm so proud :)
Now, ironing can sound super daunting, but it's not as hard as it seems. There are ways to avoid difficult or unnecessary ironing, which I will show you here too. Next post will be the basics of ironing. Stay tuned!
Laundry DIYs
So, in the theme of DIY life, I have been noticing that a common concern about the college transition is laundry, ironing, etc. One of my personal concerns is dealing with cleaning, so I figured I'd make a few posts about a cleanly college lifestyle, with life hacks and DIYs. This will all also be in my finished guidebook. Love to all, stay creative!
Wednesday, April 2, 2014
Life Hacks :)
I'm not sure if any of you have heard of this new craze on the internet called "Life Hacks," but it can be pretty awesome. The idea behind it is to "hack" or improve unnecessarily difficult tasks with easy fixes.
Some of my favorite examples:
Anyways, I am going to be regularly posting a few that I think pertain well to student lifestyle. In addition, all of my favorites with be in my DIYr Life guide. Keep updated with me! Love to all stay creative!
Some of my favorite examples:
 |
| Put old newspaper at the bottom of your bin to absorb fruit juices |
 |
| Identify Keys with Nail Polish |
Anyways, I am going to be regularly posting a few that I think pertain well to student lifestyle. In addition, all of my favorites with be in my DIYr Life guide. Keep updated with me! Love to all stay creative!
Quick Update
My Keystone, as you may know, is on College and High School DIY life. Teenagers are reinventing and creating themselves in these years, and I believe that the lifestyle skills from my DIYr life will only enhance their growth. As for my product, it will be a lifestyle guide. I will keep you all updated on how it is going. Love to all stay creative!
Monday, March 24, 2014
Youtube!
Making a Youtube Channel! Watch my introduction video and please subscribe!
https://www.youtube.com/watch?v=0Ee-nrN_zaY
https://www.youtube.com/watch?v=0Ee-nrN_zaY
Thursday, March 20, 2014


Volunteering at BHDS-- Marin
For
the volunteer component of my keystone, I am not only creating projects and
selling them for charity, but also just started volunteering at my alma
mater, Brandeis Hillel Day School, Marin. This past Monday, March 17, I had a
triple study hall (C block was canceled due to the teacher being in Israel), so
my dad and I headed to Brandeis, where I guest taught a middle school art
class.
I started the class by explaining what my
keystone was, and gave a short presentation where I showed them my blog and
some of my projects.
I was called to help because my sister, Shayna
(JCHS class of 2018!), told Lisa Levy, the art teacher, about the gift I made
for our New Orleans host organization. I created a Shrinky Dink Hamsa hanging ornament-type
thing. I will make another post about that, and a tutorial of this class that I
taught.
I then demonstrated how to draw a Hamsa with
a new technique I invented when making my gift. I answered some quick questions
and then for the next hour helped the students draw and color their Hamsas onto
Shrinky Dink Paper. It ended up being a fantastic class, and we took pictures
that will end up in their weekly newsletter, the HaShavuah. I was able to
import the photos onto my computer, and my favorites are in the next post.
Thank you to Brandeis for giving me the opportunity and being just generally
awesome. Love to all, Stay Creative! Rivi <3
Tuesday, March 18, 2014
Update
Thought I'd update all of you on my current progress.
Working title: DIY life for fun and non-profit
Product based Keystone
Volunteer progress--
Required: 10 hours, 5 of which relate to Keystone
Completed: Approx. 4 hours (need to check the record) with village project tutoring (unrelated), 2 hours teaching a middle school art class at my alma mater, Brandeis Marin,
Additional Note: Completed approx. 7 hours spent creating projects that will be sold for money to donate to arts programs so far, but I don't count those hours until I have received and donated the profit.
Plans: More hours creating and selling my projects.
Update: I will also be cleaning out and donating most of my old art supplies before college. Contact me if you are interested in them for your program, school, organization, etc.
Research Paper Progress
Yeah, I should really get on that. 0 hours.
Bringing it Back: I created a Hamsa wall hanging for our host organization for our Senior class journey to New Orleans. I will also check in with my Keystone advisor about that.
Spiritual Component: Working on it. I have quite a few ideas that I will run by Dr. Sandel and the Keystone team.
Final Product: I have been documenting in photos or video every art project, I have to compile it into a product-worthy series of tutorials.
WISH ME LUCK!
Sunday, March 16, 2014
Two Blogs
Hey so I have two Keystone blogs...as you well may know, my Keystone has suffered many transformations. I am not ready to give up either, since both have many posts that haven't been finished. So please keep up with both!
Creative Writing:
http://selfexpressionandcreativity.blogspot.com/
DIY:
http://diyrlife.blogspot.com/
Creative Writing:
http://selfexpressionandcreativity.blogspot.com/
DIY:
http://diyrlife.blogspot.com/
Monday, March 3, 2014
GIVEAWAY
I am doing a Keystone giveaway!! Get excited. This is an iPad 2 Case. Extra protective, includes double layer of fleece. The Cover of Good Night Moon is printed on fabric on the back. Flap closes the case and includes a 'made with love' tag. Colors: Blue and Green Fleece, White fabric with Goodnight Moon Cover, and rose printed fabric for the flap holder. Simply like this status on facebook and/or on this blog for a chance to win. (Disclaimer: This will not be random. Enter and I will choose from the contestants. More chances to win coming soon. )


\
Sunday, March 2, 2014
Planning my Kigurumi
To start off, I had to decide my inspiration and plan it out.
I looked up a few DIY Onesie and Kigurumi videos and tutorials:
http://www.youtube.com/watch?v=OL1q-OGoNJ0
http://www.youtube.com/watch?v=vMFAwRYhV2c
There are many youtube tutorials of this sort, these are just the two I used for inspiration.
I chose the materials I needed and made my list--
Flannel/Fleece-- I got many, many yards of fleece because it was on a two dollar sale at Fabric Outlet (http://www.fabricoutletsf.com/). Fleece is very warm and good for onesies, but through the creation process I think flannel would've been easier to sew. I thought about that when purchasing my fabric, but the fact that I got ten yards of fleece for the price of two yards of flannel just made it worth it.
- I got ten yards of fleece and only used about two of them for the onesie. However, I would suggest getting at least three yards so there is room for mistakes.
- I got about seven yards of light blue fleece and the other three in miscellaneous colors as remnants. While you could totally make a onesie with just one color, it's important for you to have at least two colors to make a Kigurumi
- It would be nice to have some scraps to make the eyes, ears, etc.
- I want to add that since I have gotten my sewing machine, I barely hand sew anymore. It's so much better, even for simple mending purposes.
- Buttons (Fun ones, big ones, plus all the random ones my mom has kept over the years)
- Zippers (Three for a dollar, I got pretty long ones since they need to zip up your entire front
- Eyelets (I probably won't use these; they surround a small hole to allow the piece to be strung up)
- Velcro (Sew on, not stick on. Stick on will never stay on fabric)
Animal Onesie
Hey guys! So I've been totally obsessed with onesie pajamas lately. I had a couple pairs as a kid, and I really miss that cozy feel (especially on rainy days like these). I found this really cool Japanese style called Kigurumi that are designed to look like animals. Unfortunately, they are pretty pricey, so I figured it could be super fun (and keeping with my keystone) to DIY them! I have been working on them over the past few days, so I will be publishing the tutorial in multiple posts as I finish them. Love to all stay creative!
Rainy Day
Today is a rainy, groggy day. Otherwise known as ARTSY day! I will be doing crafts, keystone, and homework all day (hopefully). Stay tuned for new tutorials by the hour!

Monday, February 24, 2014
Medea Makeup
Step Two of Medea costume: Makeup. I went for a dark fairy kind of look. Since it's second period tomorrow, I figured I would do it tonight so I wouldn't have to get up extra early. What do you guys think of it?


Here are my sources of inspiration:
Eyes: http://www.bellasugar.com/Halloween-Fairy-Makeup-Tutorial-25369678#photo-10
Lips: http://www.trusper.com/tips/Valentines-DIY-Lipstick-%20%EF%B8%8F/9126339
Here are my sources of inspiration:
Eyes: http://www.bellasugar.com/Halloween-Fairy-Makeup-Tutorial-25369678#photo-10
Lips: http://www.trusper.com/tips/Valentines-DIY-Lipstick-%20%EF%B8%8F/9126339
Medea Costume
Existentialism Trial is coming up tomorrow...I am playing Medea, the tragic Greek anti-heroine. She is an evil sorceress and kind of crazy, so for my costume I am having a lot of fun. Oh, and she murdered her children (that's the red paint). I have been working on a video of the process of making the costume, which I will hopefully post soon. For now, here are some photos from the red paint splatter incident last night. I am washing off most of the paint (it's a Crayola kid's washable brand) to give it less of a "horror murder rampage ghost dress" feel and more of an "evil sorceress simple smock" kind of feel. I'll post more as I continue on. Love to all stay creative!
Rivi
Rivi
 |
| Step one of the costume process |
Sunday, February 23, 2014
How to Write Beautifully With Chalk
Am I the only one who hated writing with chalk? In first and second grade, I avoided writing on the board because I could never write correctly with that annoying flat sided chalk! But, worry not, young DIYrs! I have a solution!
I found this as an image on Pinterest (see below under sources) and struggled a little trying to figure out the exact steps, so here is my version of the tutorial.
Materials:
 |
| White or regular colored chalk |
 |
| Handheld Manual Pencil Sharpener with jumbo size sharpener |
 |
| I think mine is from staples |
Places to Buy
Pencil Sharpener: http://www.staples.com/Staples-Dual-Dome-Pencil-Sharpener/product-nr_935650?cmArea=SC1678:CG11:DP1102:CL110300
Chalk: http://www.crayolastore.com/product/11964
 |
| Start with your regular piece of white chalk |
 |
| Get your pencil sharpener |
Sharpen your chalk-- It may a few minutes to get the fine point
DONE! Go and write beautifully crafted letters with your sharp, beautiful chalk!
Love to all, Stay Creative!!
Rivi
Source/Inspiration: http://www.thecreativityexchange.com/2012/10/create-a-instant-framed-chalkboard-with-black-card-stock.html

Chalk it Up to Creativity
I am a big fan of chalk and chalkboard anything. Back in my younger days we used blackboards with that obnoxious squeaking chalk and the dust that made you sneeze. So I have a special, personal connection to it.
I am going to do a few tutorials on chalk. I have many uses for my chalk. Here are a few:
- Pattern pieces for Sewing. I use white chalk to write on colored or patterned fabric and colored chalk for white fabric.
- Hemming or tailoring clothes, to mark where you want to size it to
- If you have a chalkboard (my mom is a second grade teacher, so we have them hanging around the house), it's fun to write messages.
- If you don't, I'm gonna teach you to make your own! WOAH! DIY to the rescue!
On that note, I also love chalkboard paint. For those of you who don't know, chalkboard paint is paint that creates a chalkboard surface when dry. You can get it at any hardware store or I'm going to show you how to make your own. I love it for notebooks, to label jars, door hangers, etc.
Some examples:


Want to learn? Stay tuned for chalk and chalkboard paint tutorials!
Love to all Stay Creative!
Rivi
I am going to do a few tutorials on chalk. I have many uses for my chalk. Here are a few:
- Pattern pieces for Sewing. I use white chalk to write on colored or patterned fabric and colored chalk for white fabric.
- Hemming or tailoring clothes, to mark where you want to size it to
- If you have a chalkboard (my mom is a second grade teacher, so we have them hanging around the house), it's fun to write messages.
- If you don't, I'm gonna teach you to make your own! WOAH! DIY to the rescue!
On that note, I also love chalkboard paint. For those of you who don't know, chalkboard paint is paint that creates a chalkboard surface when dry. You can get it at any hardware store or I'm going to show you how to make your own. I love it for notebooks, to label jars, door hangers, etc.
Some examples:
Want to learn? Stay tuned for chalk and chalkboard paint tutorials!
Love to all Stay Creative!
Rivi
Subscribe to:
Posts (Atom)